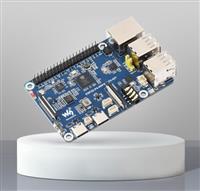
基板クイック試作
カスタム基板試作サービス
基板クイック試作
カスタム基板試作サービス
In this tutorial, we will show you how to generate Gerber files and drill files from Autodesk Eagle 9.6.2 CAD version.
Open the control panel of Eagle and select "File"->"Open"->"Board". Choose the .brd file you want to use.
This guide uses the board example provided by the Eagle. The name of the file is Arduino_MEGA2560_ref.brd.

At this point, a window displaying the PCB layout will appear, as shown in the following image:

Click on the CAM Processor button on the toolbar (the one without the green arrow), or select "File"->"CAM Processor".
Tips: To avoid potential manufacturing issues, it is highly recommended to perform a DRC check before exporting Gerber files.


Click on the document icon next to the CAM file name, and then select "Load CAM jobs"->"examples".
Choose the CAM file that is suitable for your design. Here, since we are working with a 2-layer board,we select
"example_2_layer.cam".

Use the Gerber previewer on the right-hand side to inspect the data exported in each layer of the Gerber files.
Then, check the "Export as ZIP" option and click "Process Job" to proceed.
Note:Please uncheck the box of "Negative image", as indicated by the red box in the following image.

This will generate a ZIP folder containing all the necessary PCB Gerber files.

If you want to check what is inside this ZIP folder, then just right-click on the ZIP folder and extract all the files.

And that concludes all the steps on how to generate Gerber and drill files using Eagle 9.6.2 version.
After exporting the Gerber and Drill files, you can use PCBWay Online Gerber Viewer to preview the picture:

Check Online Gerber Viewer with Long-Awaited in PCBWay Finally Comes into Service for relevant introduction for PCBWay
Online Gerber Viewer.